Know Your Why
Before diving into solar panel installation, it’s essential to understand the motivation behind the investment. Many farms are turning to solar energy not just as a cost saving measure but as a strategic move toward long term resilience and sustainability.
Why More Farms Are Going Solar
Rising energy costs are putting pressure on operational budgets, especially for energy intensive equipment. Energy independence allows farms to buffer against fluctuating utility rates and power outages. Aging infrastructure makes it an ideal time to upgrade to modern, efficient energy systems.
Immediate Gains
Reduction in monthly energy bills Lower reliance on unpredictable grid power Potential earnings through net metering or selling back excess energy
Long Term Benefits
Return on investment that compounds over 10 25 years Hedge against rising utility costs Improved budget forecasting and overhead control
A Greener Future for Agriculture
Reducing fossil fuel dependency supports the transition to sustainable agriculture Solar power supports eco certifications and green marketing initiatives Supports responsible stewardship of land and environmental resources
To explore more detailed insights, check out this guide on solar benefits for farms.
Step 1: Evaluate Your Farm’s Energy Needs
Before installing solar panels, it’s essential to get a clear understanding of your farm’s energy profile. A thorough energy audit will help you size your solar system correctly and plan for current and future needs.
Review Your Electricity Usage
First, collect your utility bills from the previous year. This should provide a broad overview of how much electricity your farm requires across the seasons, including the total yearly kilowatt-hours that you need. Make sure to collect all itemized statements. Now, tabulate the average kilowatt-hours of consumption per day, month and year. This analysis is vital, as identifying any billing cycles or periods of higher or lower energy demand is likely what you should concentrate on doing next.
Pinpoint Peak Usage and High Load Equipment
Your electrical usage does not stay the same all year long. Figuring out which equipment consumes the most electricity allows you to correctly size your solar system to accommodate demand. Make a list of equipment that draws a lot of electricity (i. e. , pumps for irrigation, refrigerated storage units for dairy, lighting in barns, ). State when each piece is operating and for how long. Find which operations take place during your peak billing periods.
Consider Seasonal Patterns and Future Expansion
Seasonality is a major factor in agriculture, as energy use fluctuates throughout the year. A good solar solution needs to address not only current needs but also potential future needs. Track energy use for each season-e. g. , planting, harvest, winter maintenance. Future plans should be a factor: future machinery, land, expanding cold storage, EV charging stations, new production lines. If done right, a good solar solution will be an efficient, scalable and practical system that suits farm usage habits.
Step 2: Assess Site Feasibility
The first thing that comes before anything else is whether your land or roof is ready for panels. It then comes down to one choice: will you install them on the roof of a barn, house or shed or install them ground mounted on your property?
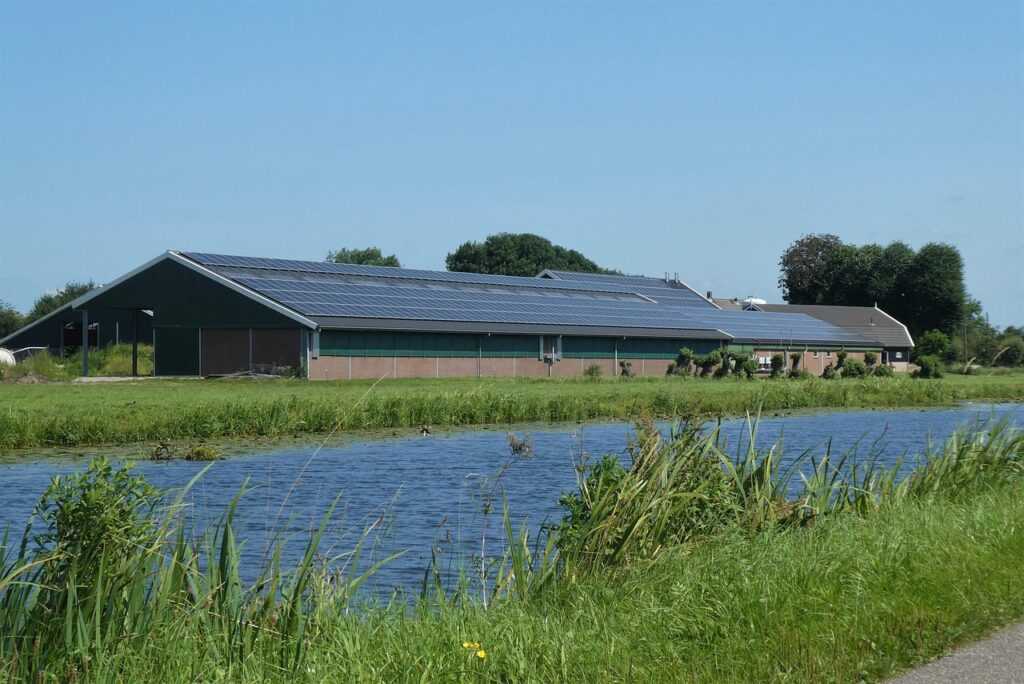
If you have South-facing roofs on your sheds or barns with lots of sunshine and minimum shade from trees or buildings nearby, roof mounted solar panels are the better and more compact choice. You do not use valuable ground area and it will most likely be less cost effective than ground mounted, but not all old roofs can withstand the weight of solar panels or be tilted enough to achieve the best efficiency.
On the other hand, you can take full control of the orientation (South-facing in most of the Northern hemisphere), pitch and placement of the panels when ground mounted. This is ideal if you have a spare plot of open ground with consistent sun all day long. You have more leeway as the roof will not dictate anything at all and maintenance should be easier. This requires you to own unused ground and possibly requires the need for fencing or clearance around the panels.
When dealing with any sort of solar installation, sunlight exposure is important. If you plan to roof mount solar, a solar pathfinder tool would assist in tracing sun coverage throughout the day and across all seasons, as well as a site assessor who is recommended to do so on your behalf. Shade from any buildings, trees, a silo or even a hill nearby will reduce your panels efficiency by 50% (minimum), so you are best served to locate a spot where you will receive full, uninterrupted sun, especially at solar noon.
In terms of soil quality for ground-mounted panels, you may wish to make sure you have a flat piece of stable, well-packed soil in which to drive posts for the mounts. Soft or rocky terrain could be problematic and could raise the construction costs of the system and rooftops must also be structurally able to withstand the added weight of the solar installation. Ideally, hire an engineer or a structural consultant to give your house an evaluation if unsure.
Once you have a solid understanding of these elements, you are taking crucial steps in saving yourself thousands of dollars and hours of hassle down the road by understanding what factors affect a site before you invest in the equipment.
Step 3: Budget and Funding Options
Planning a solar installation is more than choosing panels it’s also a financial decision. Farms looking to go solar should consider both the initial investment and long term financial benefits. Here’s how to think through the numbers:
Understand Upfront Costs vs. Long Term ROI
While up-front expenses can be substantial (covering equipment, installation, permitting and interconnection fees), solar can still yield a great return on investment. Typical payback periods for solar PV systems are in the range of 5 to 10 years (though this depends on usage and available financial incentives) and once you have recouped your investment, your energy from the sun is effectively free for the 25+ years that your panels are expected to last, helping you to hedge against volatile and rising energy prices.
Explore Available Incentives, Grants, and Tax Credits
Support for ag solar from governments is widespread and expanding rapidly and utilizing available options effectively could result in much lower out-of-pocket costs. Some of these are:
*Federal Investment Tax Credit (ITC)-the percentage of your total solar costs that comes back to you.
*USDA REAP Grants-Rural Energy for America Program loans and grants are available for renewable energy on farms.
*State-level incentives-most states include additional grants, rebates, tax credits or renewable energy certificates (RECs) they will fund.
Pro tip: Combine federal and state programs to maximize savings.
Compare Financing Options
You can finance this instead of buying outright. There are loans that let you lease. The leases allow for much lower startup costs and lower upfront payments. The leases also give you tax breaks if you decide to purchase later down the line. The PPA (power purchase agreement) financing allows the provider to put the solar on your roof and have them sell power back to you at a fixed rate per kilowatt hour below market rate. The company’s financial department can do the math and present you the benefits of a PPA versus a lease. A large corporation will most likely do the same as SunPower in this circumstance by having their finances work out best in terms of money gained or money saved.
Consider working with a solar consultant familiar with agricultural setups who can help you compare options tailored to your farm’s size, power load, and location.
Step 4: Choose the Right System and Installer

Not all solar panels have the same quality, which is what happens in real life on a working farm. One should look for high-efficiency and durable solar panels capable of withstanding dirt, trash and extreme weather fluctuations. Monocrystalline panels are longer lasting and operate at higher efficiencies under fluctuating sun conditions, which is important for irrigation, refrigeration or operating heavy machinery. For inverters, it is important to stick with string inverters for large systems or use microinverters to distribute the system to different panel areas and achieve greater control over each panel’s performance under shading conditions.
The installer plays a vital role. Make sure to hire NABCEP-certified installers who have installed systems for farmers previously. They should visit the site, have a meeting with you, learn about your energy goals and should not sugarcoat the requirements to maintenance work over the years. Ask for a sample of their previous work and if possible, let them give you names and numbers of previous farmers.
Obtain different bids and do not select one based purely on the bottom dollar, instead, comparison shop and examine solar warranties for panels, inverters and installation work, as well as for projected energy output based on the size of your typical electricity bills. A system that appears cheaper might underperform in the coming years. Therefore, look at a long term value based on the life of the equipment.
Step 5: Permits, Paperwork, and Approvals
You need to get through red tape before the panels even arrive. Depending on where you live, laws related to your land may prevent solar installation and require special permits. Though easier for homeowners in rural communities, do not rely on this. If your county is concerned about environmental impacts, you will likely need to undergo an assessment of that and potentially listen to the concerns of local communities.
Following local approval, you need your utility company to agree to allow your system to provide power to your town. The company requires copies of installation diagrams and detailed plans of your system before approving anything. Depending on your utility company’s policy and backlog, this step can take some time. Make sure you communicate with your company and nudge the process along if needed.
As soon as you decide to proceed with a solar installation, file every relevant rebate, tax credit and grant you qualify for. Some tax breaks are generous for farmers adding solar. Some federal tax incentives are attractive and should not be overlooked and each state offers various rebates and/or grants to farmers for installing solar systems. Be aware that many of these rebates and tax credits require you to apply before the start of your installation project and are competitive. Filing can be intimidating because of the amount of required paperwork and short filing dates, so do not start these applications late in the game and get assistance with the process if needed.
Once your installation is complete, local building and electrical inspectors and the local utility company have to approve the system before it is turned on. You will want to work closely with these people so your system passes inspection the first time and so you do not have another delay on top of the already long and painful installation process. Once all of your system’s approvals are complete, you may flip the switch and begin producing your own electricity.
Step 6: Installation and Grid Connection
Once your permits are approved and your system is ready, it’s time to move into the installation phase. This is when your planning turns into power and it’s essential to do it right.
Timeline of a Typical Installation
Your installation should not take too long, but you need to be ready for it. Here is a run through with site readiness activities included. The day before installation: you will be in the process of securing everything: making sure the site location is in place and the equipment is delivered correctly along with all security arrangements. The following three weeks installation phase will take from 5 to 10 business days total depending on the installation’s size. Final inspections by engineers/an inspector and getting final permits to hook up to the grid can take another 1 to 4 weeks.
Keeping Farm Operations Running
Solar installation doesn’t have to disrupt your daily work. With proper scheduling and communication: Coordinate with your installer to avoid key harvesting or planting days. Use buffer zones around active fields or livestock enclosures. Request weekend or phased installations if uptime is critical.
Connecting to the Grid or Staying Independent
Depending on your goals, your system will range from simple grid tied panels (where you sell all excess energy produced back to the utility, net metered) to a hybrid setup with a battery bank where the energy can be stored and used when you need it (during blackouts or peak-use periods). If you need the highest degree of energy independence (and do not trust the utility at all or need power off-the-grid), you would require an off-grid system.
Ask your installer to see which option best matches your priorities for the system: cost, energy needs, available acreage, etc.
Step 7: Monitor and Maintain
Installing solar panels is only the beginning long term performance and payoff depend on ongoing monitoring and maintenance. Step 7 ensures your system continues to deliver maximum energy and savings year after year.
Tools to Track Solar Performance
The most vital part of maintaining a working solar panel setup is consistent monitoring of production rates. This works equally well whether you are tied into the electric grid or entirely off of it. Your solar inverter should have some kind of monitoring suite, either through an online web portal or via an app for your smartphone that can be accessed remotely. It will show you your live production output, with options to review production historical data over various time periods (e. g. , daily, weekly, monthly and even yearly) to see seasonal variations and detect any large, unexpected drop offs.
Preventative Upkeep: Keep It Clean and Checked
Clean up components or you damage them, wear them out and the efficiency of electricity production will be lowered. In fall or after heavy hail-make sure to wipe the dust off of your panels. Do it seasonally to avoid damage to their energy yield. Make sure all of the components are correctly plugged in to the inverter. Otherwise, the inverter might over heat and you will lose electricity. Take note of damaged wires or panels. See if any loose components or broken or worn out plastic might be an issue. Check your panels a few times a year for issues like this. Besides, I suggest that you schedule a service visit from your panel professional at least annually, just so they can do an inspection.
Troubleshooting: What to Watch For After Year One
You will typically only face issues with a poorly installed and unmaintained solar system in its later life. Catching these problems early can save you hundreds, thousands of dollars. Unexpected decrease in output usually points to some sort of shading, a faulty panel or some sort of inverter trouble. Also, if your output varies in short intervals, you could have loose connections or problematic sensors. Some warning or error signals in a monitoring app or on an inverter can mean nothing, but they should always be taken notice of.
Why It Pays Off
When installing solar panels, it is generally just a better idea to get something functional, though it is certainly an investment. Your solar power system dramatically cuts your electricity use. Each year, those panels will pay for a portion of your farm’s operations costs. Since the electricity comes directly from solar, it is not impacted by fluctuating utility rates, the cost of diesel for powering generators or whether a power line is down.
Every month, you have a reduced electricity bill and each year your cost decreases as the technology continues to improve and as the lifetime utility of the system extends. Your property increases in value if you choose to use solar power. A rural property with solar power provides security and sustainability from a rural, country point of view, rural buyers will especially think better of the value.
Farm and acreage property is valuable to owners not only for use as farmland but also for long term value that is not subject to some distant fluctuation on an electric power grid. Being able to point to a solar power system can show to others-especially the growing number of people who would prefer that their farmer be green-that your operation respects the planet.